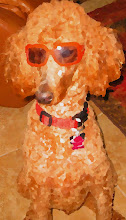
David and Sarah were both pirates.
Sunday, October 31, 2010
Monday, October 25, 2010
I AM the MASTER of the clock! (aka.. Mod Podging a clock)
I know, the title of this post is a little strange, but this clock project I did was a real booger. I don't have a clock in my craft/sewing room/library/guest room and every time I go to work in there, I have to get up frequently to check the time so I don't miss Sarah's after school pick up time (I know... it would be easier to wear a watch, but somehow, I always for get to put it on). I didn't want to spend much money, but the only cheap clocks were really.... I don't know... cheap. I have been Mod Podging things and figured I would fix up one of the cheap clocks to make it look better.
Here is the before picture of the clock. It's a $5 clock from Wal-Mart.
I took the clock apart and pulled off the face. Unfortunately, after I pulled off the hands, I decided to put them back on to make sure the clock would still work. It did. so I took the hands off and when I did, the center pin came out with the second hand. It didn't work after that. Back to Wal-Mart for another $5 clock.
I had the perfect scrapbook paper that I had bought for another project. It is Tim Holtz Ideal-ology Lost and Found stack. It has lots of really cool vintage designs. If you want to take a look at it, HERE is a link. I cut one of the smaller clock faces out of the top corner to put in the middle of my clock face.
Since I broke the previous clock when I took the hands off, I decided to not chance it and just work around the hands. I cut a small hole in the center of the paper and a slit from the edge to the middle, covered the face in Mod Podge then carefully slid the paper in place. Next I covered the face in several coats of Mod Podge, moving the hands of the clock around as needed.
I bought a fat quarter of a marble looking fabric at Jo Ann's, cut it into strips and Mod Podged it around the edge of the clock on the inside and around the outside rim.
Next thing I did was put the clock back together. It didn't work. I don't know what I did wrong. I was very careful with it... UGGG! I was frustrated. Two clocks down. I told myself one to go and headed back to the store. This time I was at Target and found this one for $2.87. I didn't know what to do with it. The paper stack I bought only had one large sheet of clocks and the store I got it at didn't have any more. I really didn't want to start from scratch and the clock from Target didn't look as easy to decoupodge because the outer rim was part of the clock (unlike the Wal-Mart one that was separate)
I started looking at the clocks and decided to see how easy it was to remove the clock mechanism. I used a screwdriver and they popped right off of the Wal-Mart clocks. Tried the Target clock and it worked. I was so relieved! I put my clock back together, put the battery in. It didn't work! It was doing the same exact thing as the 2nd one that didn't work. I almost cried (seriously). Wait a minute! I looked more closely... I had put the same broken clock mechanism right back on the clock (is it time to stop dying my hair blond?). I got the screwdriver again and popped it off again. When I did, I broke the plastic piece that holds the mechanism in place. GRRRR! Only a minor frustration, though. Nothing a hot glue gun couldn't fix. I put the right clock mechanism in, but a battery in and HALLELUJAH it WORKED!!
After doing a happy dance for the next 5 minutes, I cleaned the glass, put it all back together and hung it up.
I think I'll do another one for Sarah's room and for the guest bedroom. I'll post pictures when I get them done. It will be a while because I finally found a side table (for $3.99!! at a thrift store) to redo for the media room. I have no idea how to do it, but I know I am using paper from this scrapbook pack (it's what I bought it for).
Saturday, October 23, 2010
Wine Making
A couple of months ago, we got the opportunity to join a wine making group named Woof Woof Winery. Living in this area of California has been great! The wine group is mostly E.J. Gallo employees (Gallo's headquarters is in Modesto), with the leader being the director of training for Gallo. He has all the wine making stuff at his house and a small temperature controlled building built in his back yard (AKA "The Dog House"). So far, we have had 2 working days. On the first Saturday, David went out with them and they picked a bunch of grapes (don't remember what the weight was, but it was a crate about 4'x4'x4'). Sarah had a soccer game that morning, so I joined them back at the Dog House to help with the rest.
This was the first step of wine making... crushing the grapes (no, not really... this was just for show... I hope we didn't really use these grapes!)
This is what we used to crush the grapes (the gray crate in the back of the truck was full of grapes).
Here, they were putting grapes in the hopper, the guy in the back was turning the crank to crush the grapes.
Here I am, picking stems and leaves out of the grapes after they have been crushed. It was a messy, messy, sticky job, but it was great!
All of the grapes and juice went into a large fermenting tank where it sat working it's magic for a few days... during the week some of the group did some stuff to the wine (can't remember all the details, it was a little over a month ago). We are making 2 wines. One of them is a Repasso wine. This is "re-passing" a lighter wine over a bigger wine's "squeezings" which adds body, color and flavor, and kicks off a secondary fermentation that boosts it's alcoholic content. (YIPPEE.... can't wait till that's ready!).
While some were crushing grapes, others were emptying last years port out of the barrels so that it could be bottled. Once all of the port was in the big steel thing, they bottled and corked it.
The next weekend we pumped the wine into the barrels, pressed the grapes and labeled the port bottles from the week before.
This isn't the actual wine press we used (someone forgot the camera that day)... but you get the idea. Ours was a little bigger and had a round crank on the side.
At the end of both work sessions, lunch and lots of wine are served. It was nice to try several of the previous years wines. Most of them were really, really good. At the end of the 2nd work day, we tried the Repasso wine that we are making. It was finished fermenting and all that stuff, but hadn't aged yet, so it wasn't very good yet. We are both looking forward to the final product of this years work.
And finally, after each work day, we got to take home a bottle of previous vintages as "payment"... we both chose the Sir-Ahhh and the Chewed Shoe Cabernet. They were both very good!
We have a Christmas party coming up in December and some other activities, such as coming up with a name and label for this years wine and some other activities. I'll keep you posted!
Wednesday, October 20, 2010
Breakfast at Tiffany's
Mackenzie and I watched Breakfast at Tiffany's for the first time not too long ago. What a great movie! It has got to be one of the best ever. I found a blog that is giving away a Breakfast at Tiffany's fat eighth bundle. Go check it out and enter to win (and Steph, if you win, save it for me!). It is at Green Fairy Quilts. She also has lots of precut fabrics and her own patterns for sale. It's a great web site!
Monday, October 11, 2010
Beach Day!
We have been in Cali for just over a year and finally made it to the beach! (except for the one time we went to Santa Cruz when it was 50 degrees and raining-- we don't count that one). We met one of David's co-workers/friends and his family up there. They have 2 kids (3 and 6 years old)...We left around 10:30 and headed out. David's GPS took us the scenic route (not sure why!) so it took a little longer to get there than it should have, but we were there, parked and eating lunch by 1:00 (we drove around for almost 30 minutes trying to figure out where parking was. The weather was great. It was about 75 degrees and sunny. The water was freeezzing! The people who were spending any time in the water at all were wearing wet suits! We went out about knee deep and that was enough. David built a sand turtle. Cory (friend) built an alligator (he's the creative type). Sarah and I built a sand hill (not the creative types!) and dug a hole about 2 feet deep. We had a blast! On the way home, we all stopped at Psycho Donuts for dinner. I'm sure this will be the only time I feed my family donuts for dinner!
Check out the menu for Psycho Donuts! I tried to upload pictures from their website, but couldn't. I had a chocolate cake donut covered in chocolate icing and Butterfinger crumbles. Mackenzie had a Smores donut. They all have cool names. Take a look at it. It's a fun donut shop!
This was the view from the restaurant we had lunch at. |
Cory's alligator |
David's turtle |
Sarah got in the hole we made and we buried her |
Kenzie and Sarah on the turtle |
At Psycho Donuts they have a small padded room with costumes to take pictures. Fun! |
Check out the menu for Psycho Donuts! I tried to upload pictures from their website, but couldn't. I had a chocolate cake donut covered in chocolate icing and Butterfinger crumbles. Mackenzie had a Smores donut. They all have cool names. Take a look at it. It's a fun donut shop!
Friday, October 8, 2010
More on my quilt
I'm working on my quilt almost every day. I never seem to have time to work on it for more than an hour at a time. I'm pretty sure that a "disappearing 9 patch" is not the best quilt for a non-sewer, non-quilter to start with! I also should have made my patches a little bigger. Learning along the way! Here is what I'm doing....
I cut out 2 inch strips in a light and a dark fabric.
Sewed the strips together. One with 2 lights and a dark and another with 2 darks and a light.
Then I cut the strips into 2 inch segments.
And sewed them together to get a 9 patch. This is where I should have stopped!
But, no...I wanted a disappearing 9 patch.... so I cut each patch in half both ways
I made 4 of these and put them all together.
Next, I flipped some of them around
and sewed it all together.
Here's what I have so far. Any suggestions on how to put it all together?
Subscribe to:
Posts (Atom)